How to Set up a Jira Azure DevOps Integration: The Comprehensive 2025 Guide
Many companies seek the right software integration solution to sync data flexibly and collaborate. Let’s say your team works in Jira while your customer or partner works in Azure DevOps. The need for a Jira Azure DevOps integration becomes obvious when both sides need to work in their own environment.
Such integration helps teams to manage their data according to their roles and needs. In this guide, we’ll discuss the need to integrate Jira with Azure DevOps and how to share information between the two. We’ll show you how this integration is set up to keep teams and projects in sync. Once you’ve set it up, it will do the heavy lifting for you, leaving your teams free to focus on their work.
Note: In this tutorial, we will use a software integration tool called Exalate to set up the integration. You will learn more about this throughout the guide.
Here is an overview of what we’re going to cover:
- Why Integrate Jira and Azure DevOps?
- Common Use Cases for a Jira Azure DevOps Integration
- How to Choose the Right Technology for Setting up an Integration
- How to Set Up a Jira Azure DevOps Integration (a Step-by-Step Process)
- Advanced Azure DevOps Jira Integration Use Cases
- Best Practices for Jira Azure DevOps Integration
- Architecture, Security, and Deployment for a Jira Azure DevOps Integration
Why Integrate Jira and Azure DevOps?
Jira is an issue-tracking and project-management platform. It is popular with developers and a good fit for teams using an agile methodology. You can use it to assign tasks and manage bugs. It comes in two main versions. We’re looking at the cloud-hosted version here, but you can also self-host if you prefer. If you’re running an open-source project, Jira is free, making it a particularly good choice.
Additionally, it’s highly customizable and has a range of extensions available on the Atlassian Marketplace. These let you extend its functionality. We’ll be taking advantage of that capability to set up our Azure DevOps Jira integration.
Azure DevOps, on the other hand, is a system that lets you keep track of your code and manage projects. It handles code versioning and has features for testing, building automation, and release management. Like Jira, it is popular with developers and integrates well with Visual Studio, Microsoft’s popular development environment, as well as Eclipse.
It also has something in common with Jira, and that’s its 2 versions. You can use it on the cloud, or host it on your own server. It has a marketplace full of extensions, letting you expand what it can do.
Why Integrate Azure DevOps and Jira?
Both platforms have different strengths, useful for teams in various roles. A company might have a back-end team working in Azure DevOps, and a front-end team using Jira, for example. Alternatively, you may be using one system for developers and one for customer support.
You could choose a Jira to Azure DevOps migration as a solution to keep both platforms in sync. However, it’s not always cost-effective and feasible to do that.

The biggest advantage of setting up a Jira Azure DevOps integration is that the teams have the freedom to set up their own platforms however they want. They will work in their own environment and won’t need to worry about losing security or autonomy in the process. They can exchange data between Jira and Azure DevOps based on certain conditions and ensure teams have visibility over important information.
Common Use Cases for a Jira Azure DevOps Integration
We saw why a Jira Azure DevOps integration is needed in the first place, let’s also have a look at a few common use cases. These are just examples, of course, your integration scenario can be slightly different.
Development and Testing Teams
A lot of organizations have their development teams working in Jira while the testing team uses Azure DevOps. With a Jira Azure DevOps integration in place, a workflow can be orchestrated so that whenever an issue in Jira is put under review, a work item type (test case) is automatically created in Azure DevOps. Notifications, status changes, comments, and attachments can all be passed between these teams automatically.
Once the testing task is done, the status on the Azure DevOps can be reflected as “ready to release” in Jira, and then relevant releases can be planned. All of this seamless collaboration can happen within the same familiar environment your teams use.
Customer Service and Development Teams
Jira Service Management is a popular tool when it comes to managing customer service end-to-end. Sometimes, certain tickets (especially bugs, feature requests, etc) need to be passed over to the development team working in Azure DevOps.
With an integration in place, such tickets can be passed over to the development team at the flick of a switch. Relevant information about the ticket can also be passed as attachments, comments, or custom fields. The entire time the dev team works on the ticket, the customer support agent will have complete visibility of the current status and can update that to the customer proactively.
A Jira Azure DevOps integration can make all of this easier.
However, the main question remains, how to set up a Jira and Azure DevOps integration?
Some companies choose to build the integration themselves, resulting in massive time and resource loss. Others choose native ways to integrate Azure DevOps with Jira. These native ways can work well for simple use cases but are not adept at handling advanced scenarios. And then there are third-party integration solutions that can make your integration worth the effort. But if you feel lost between the numerous options in the market, we are here to make that right!
Let’s delve into the next section for the answer to all your problems.
How to Choose the Right Technology for Setting up your Azure DevOps Jira Integration
Choosing the right technology for your Jira Azure DevOps integration be challenging. If you can meet those challenges, you’ll be able to work more efficiently and productively. There are three things you need to think about when choosing an integration tool.
Flexibility
Business and customer needs evolve continuously. Data you sync today might not need syncing next year, or you might need to sync entirely new data. This often means spending significant time and effort reconfiguring your integration tool.
A top priority should be a tool that enables seamless information exchange with minimal configuration, even for complex and customized use cases. It should allow you to handle changing business requirements with ease and minimal adjustments.
Reliability
Once you’ve set the integration up, you want it to work in the background without any fuss. The solution should also be able to deal with the downtime of one or both platforms and be able to get everything back in sync once they are online. A reliable tool lets your teams get on with what they do and doesn’t need anyone to spend time managing it.
Decentralized Integration
The solution should allow the teams to work independently, according to defined workflows. They should be able to exchange data between their platforms independent of the other side.
This means once the integration has been set up both integrating sides need not coordinate with each other for changes in the sync requirements.
The integration solution should be able to manage this change and let teams make adjustments without being dependent on the other end or needing a complete system overhaul.
Security
An integration, in essence, requires data to leave from one system and enter into another, posing inherent security risks. To minimize these threats and ensure your Jira Azure DevOps integration always remains secure it’s important to choose a tool that puts security at the forefront.
A decentralized integration setup explained in the above section ensures you exchange only the required data and prevent unauthorized access.
Additionally, prefer tools that have the required certifications, like ISO 27001, and security mechanisms like encryption, RBAC, etc.
In this blog post, we choose Exalate as our tool of choice. We’ll see how to set up a Jira Azure DevOps integration using Exalate and then discuss some advanced practical use cases.
How to Set up a Jira Azure DevOps Integration (a Step-by-Step Process)
To set up our integration, there are three main steps to follow. First, we install Exalate on Jira, then we do the same for Azure DevOps. Then finally, connect Jira to Azure DevOps. We’ll also look at how to control what information is shared, and what triggers data exchange.
We’ll get to the step-by-step process of the Jira Azure DevOps integration, but if you don’t like reading, you can go ahead and watch this tutorial instead.
Note: There is also a step-by-step Getting Started guide on the Exalate documentation site where you can choose Jira and Azure DevOps as the integrating platforms and proceed.
Step 1: Install Exalate on Jira
We’ll start by setting up Exalate in Jira. If you’d rather follow the documentation, check this link.
Note: If you’re running Jira on-premise instead of the Cloud, click here instead.
First, we need to find and install Exalate.
To do that, click the Jira administration settings button and choose “Apps” from the drop-down menu. On the left-hand menu, select “Find new apps”. Type “Exalate” in the search box and press enter. You’ll see multiple apps listed.
Select the “Exalate Connectior for Jira, Issue Sync & Two-way Integration” app.
You can also search for the Exalate app directly in the Atlassian marketplace.

Either ways, click on the “Try it free” button.
On the next pop-up, you will get to see the app details. Click on the blue “Start free trial” button there.
After a while, the Exalate app will be added to your Jira instance. Click on “Get Started” to go to the first screen of Exalate. We’re now ready to go on to Jira, but before we can connect our platforms, we need to set up Azure DevOps, too.
Step 2: Install Exalate on Azure DevOps
As with Jira, we need to install Exalate on Azure DevOps before connecting the platforms.
To install Exalate on Azure DevOps, you can either visit the Visual Studio and look up Exalate.
Or you can look for the Azure DevOps connector for Jira on the Atlassian Marketplace.
Note: You can also request an assisted trial through the Exalate’s integrations page, if you’d like to already discuss your use case with an integration engineer.
If you’re running Azure DevOps on your own server, you can install it via docker, in which case read this guide.
We’ll go through the steps for installing it from the marketplace.
Note: Here are the detailed steps to install Exalate from the marketplace.
Make sure you are logged in to Azure DevOps with admin privileges. Click the icon at the bottom left of the screen saying ‘Organization settings’. Then click ‘Extensions’ in the left-hand menu, under the ‘General’ heading.
 You’ll see a list of installed extensions if you have any, or a message telling you that you don’t. Next, click the “Browse Marketplace” button.
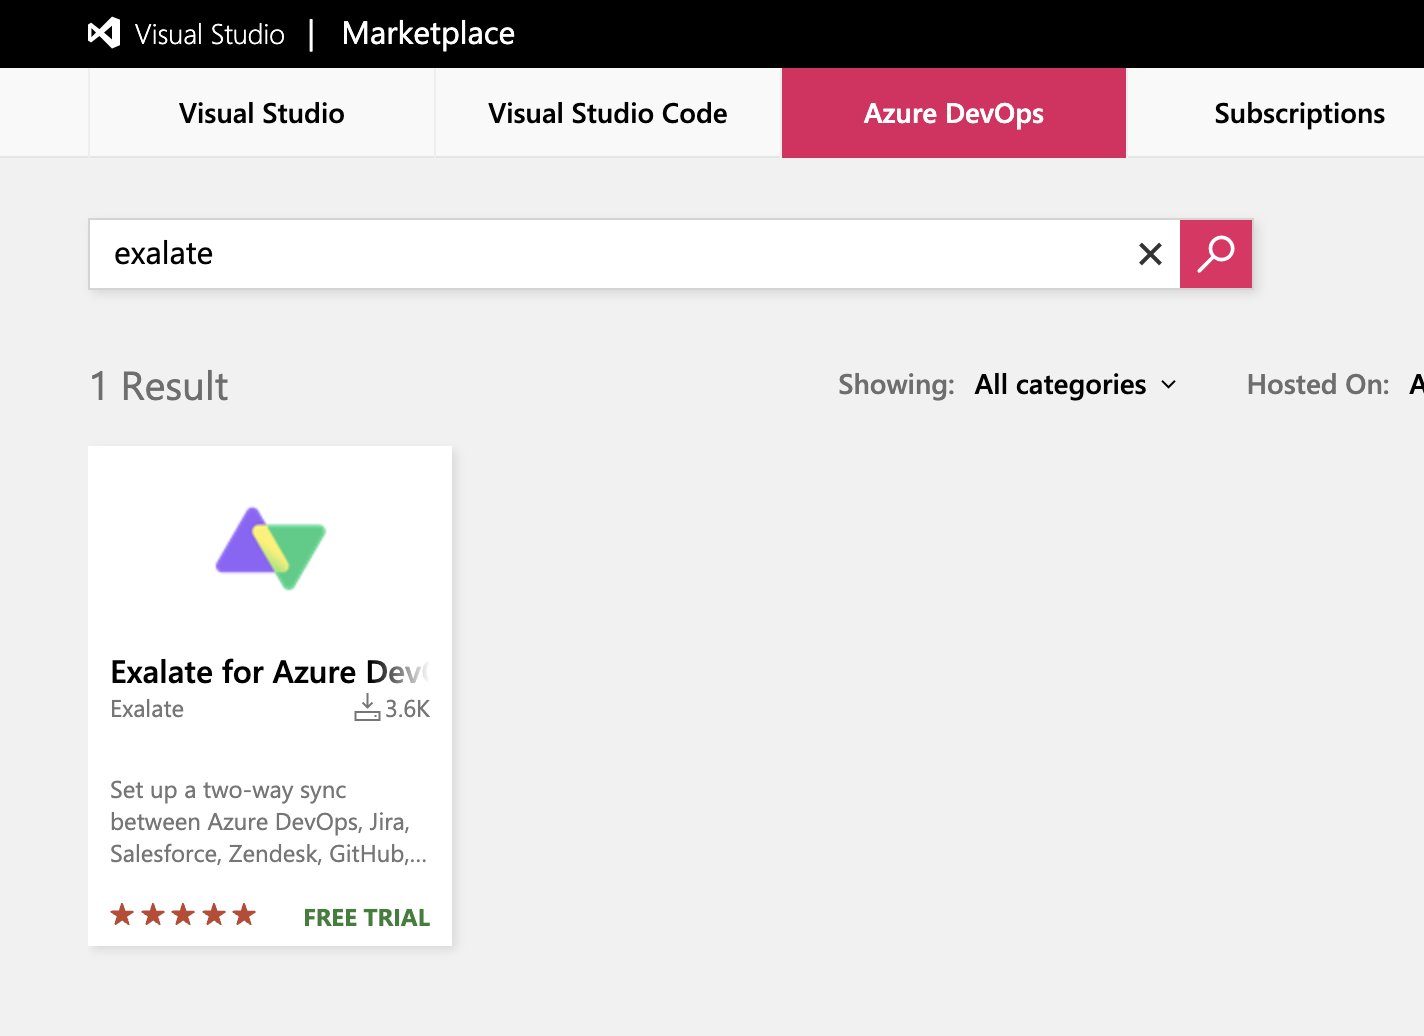
You’ll be taken to the Visual Studio Marketplace. Click in the search field at the top and search for “Exalate for Azure DevOps”.
Click on the app’s icon. On the app page itself, click the green ‘Get’ button.
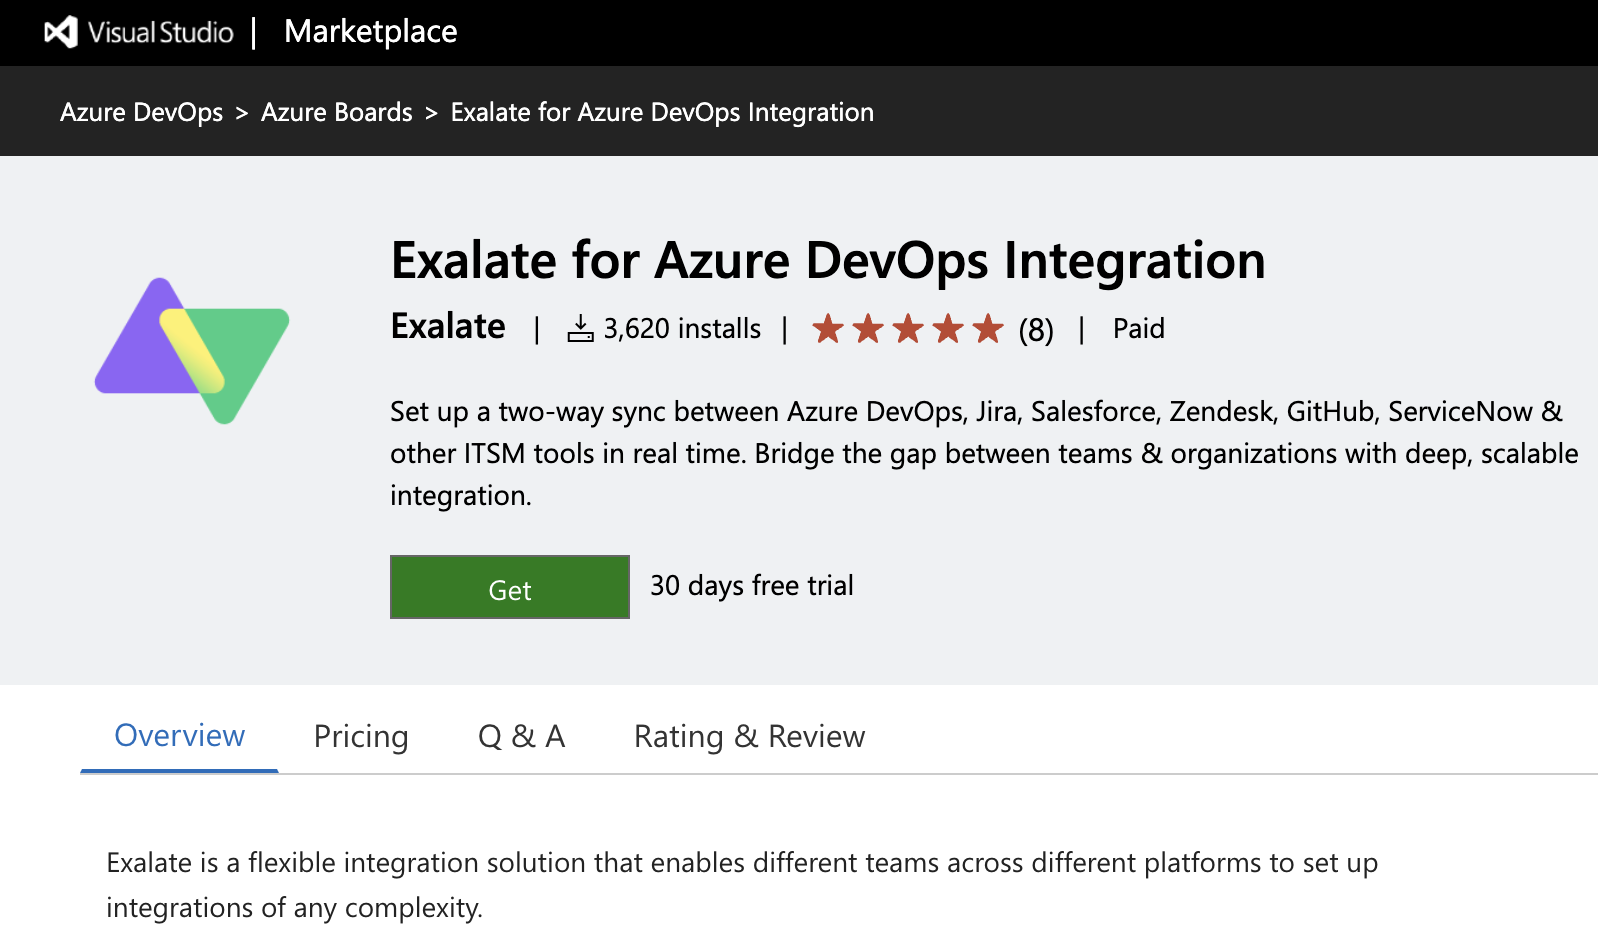
You’ll next see a screen when you have to pick the organization that your installation will work with.
Choose one from the drop-down list and then click “Install”.  After that, Exalate is ready for use on Azure DevOps.
Step 3: Connect Azure DevOps and Jira
Now that we’ve installed Exalate on both platforms, we need to create a connection. We’ll initiate the connection from Azure DevOps here, but you can start from Jira as well.
Look at the “Settings” page on Azure DevOps and under “Organization Settings” – “Extensions” you can see Exalate.
After clicking it, you’ll see there’s a “Connections” item in the left-hand menu. Click that now.  Next, click the “Initiate connection” button in the top right.
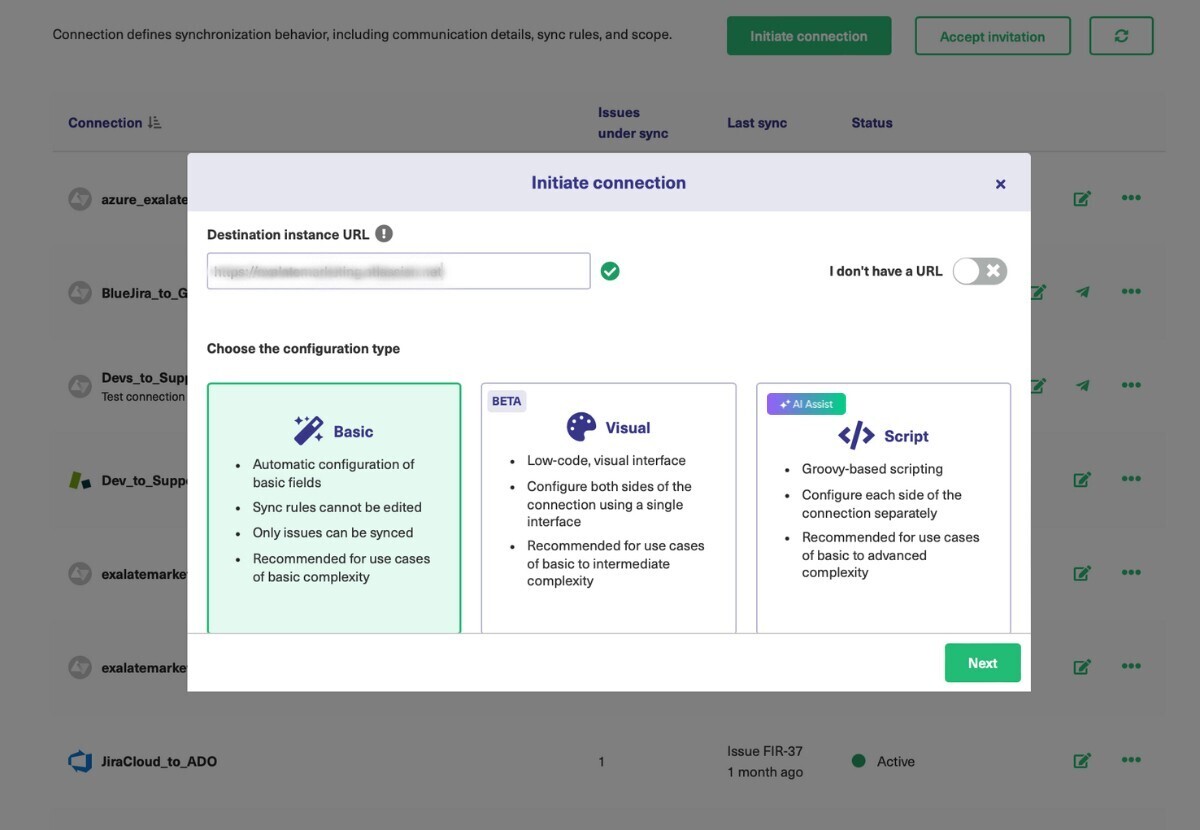
Enter the URL of the Jira instance used in step one. When you’re done, click “Next” again.
Exalate allows 3 types of configuration modes: Basic, Visual, and Script.
The Basic Mode is for basic synchronization needs. You can instantly start syncing your first work item or issue using this mode. There aren’t any advanced configuration options for this mode though.
The Visual Mode is a low-code, intuitive interface for setting up and configuring the connection with advanced features.
The Script Mode is for unique and complex advanced use cases. Exalate uses the Groovy scripting language for configuring connections established using this mode. We will continue initiating the connection for all of these modes one by one.
The Basic Mode
The first step after clicking “Next” is to select a project on the Azure DevOps side. Choose the correct one from the dropdown list and hit “Next”.
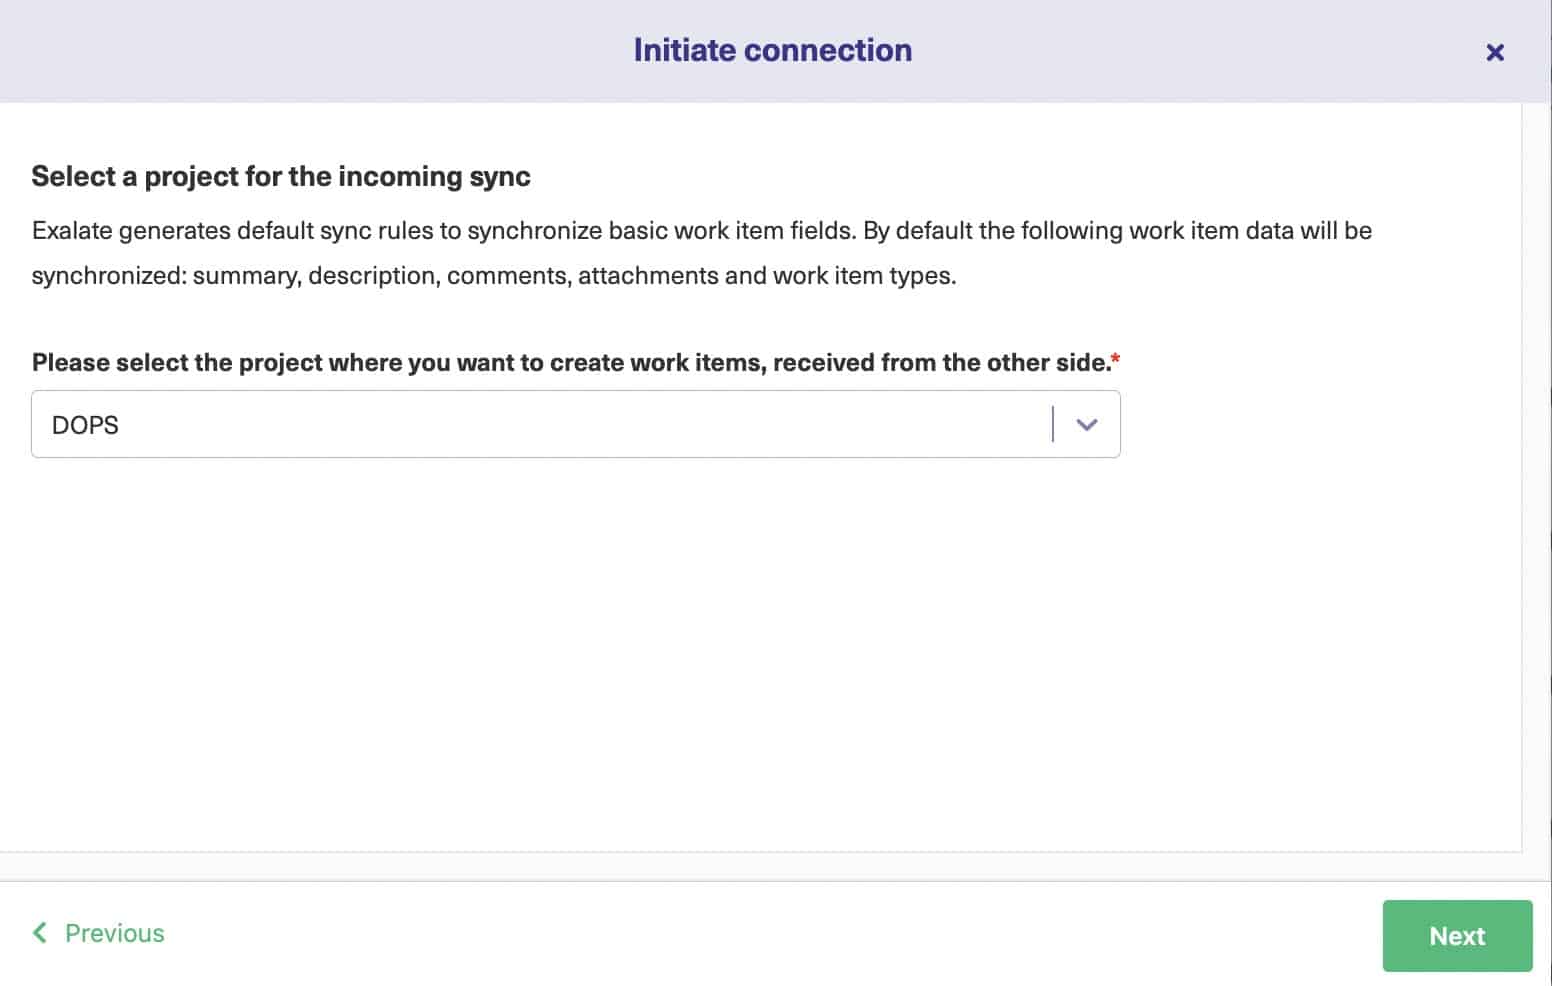
Verify admin access to the Jira side next.  If you have access, hit “Initiate” and you will be redirected to the Jira side for further steps.
Note: If you don’t have access, an invitation code will be generated. You need to copy this code and head over to your Jira instance. Click “Accept Invitation” in the “Connections” tab of the Exalate Admin console, and then paste the code you just copied.
On the Jira side: Pick the project you want to synchronize from the drop-down list, then click “Confirm”.
This successfully establishes the connection using the Basic Mode. In the Basic Mode, you cannot configure the connection, you directly move towards either syncing your first issue/work item, creating a trigger, or syncing issues/work items in bulk using the “Bulk Exalate” feature.
For the first option above, enter the issue key, and click Exalate. 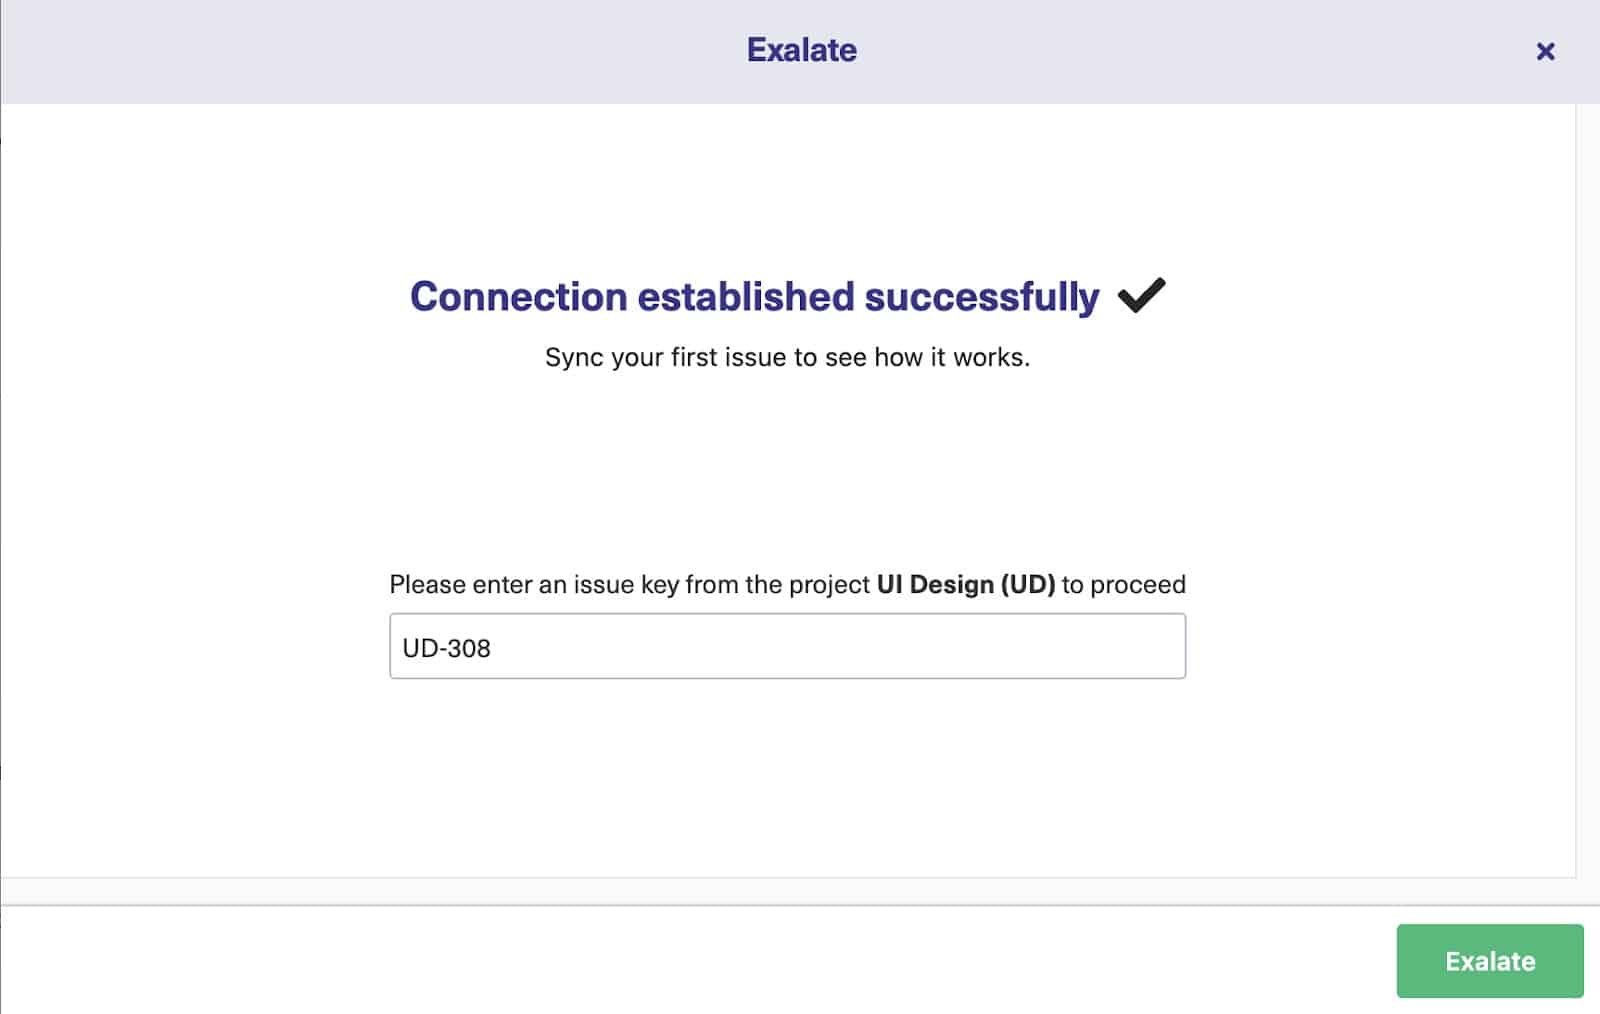
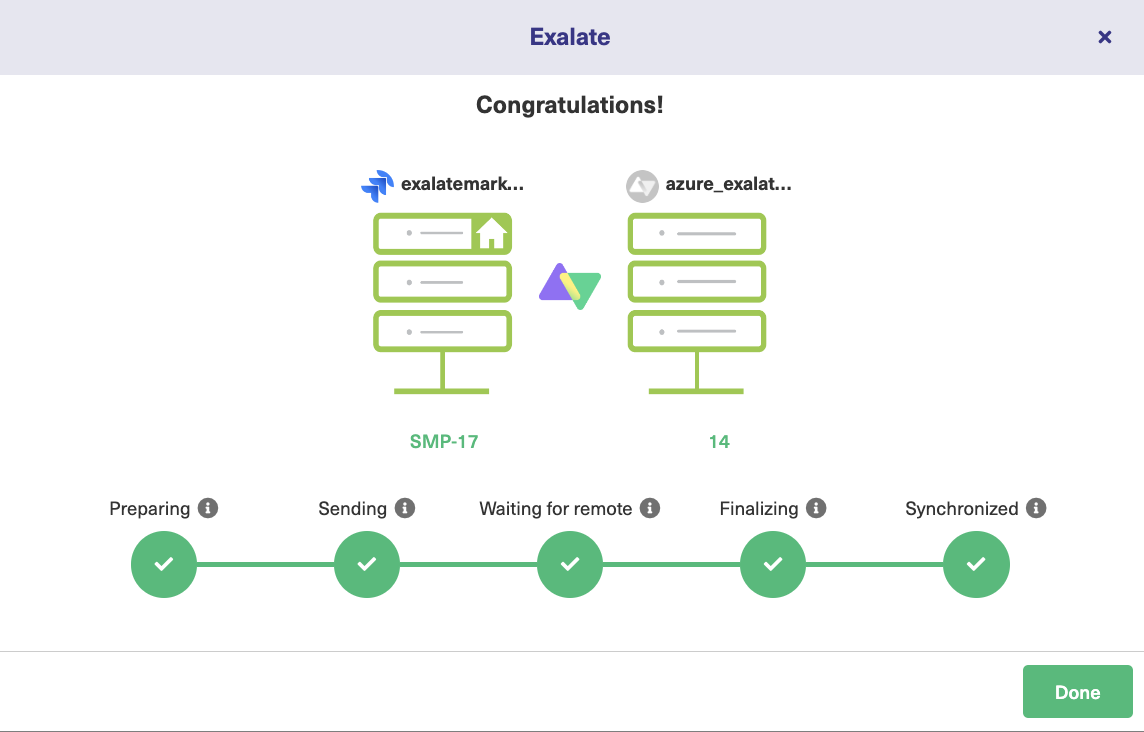
You can see the issue being synchronized almost immediately!
Note: If you head over to the Azure DevOps instance right now, you can enter the work item number for which you want to start the synchronization.
The Visual Mode
Select “Visual” and hit the “Next” button. Give a short name to the local instance, Azure DevOps in our case, and a name to the remote instance as well (Jira). A connection name will be generated automatically based on these names, but you can change it if you want.
Optionally, add a description. Doing this will help you identify it later.
Now click the “Next” button.  After clicking “Next” you will be asked to verify admin access on the Jira side.
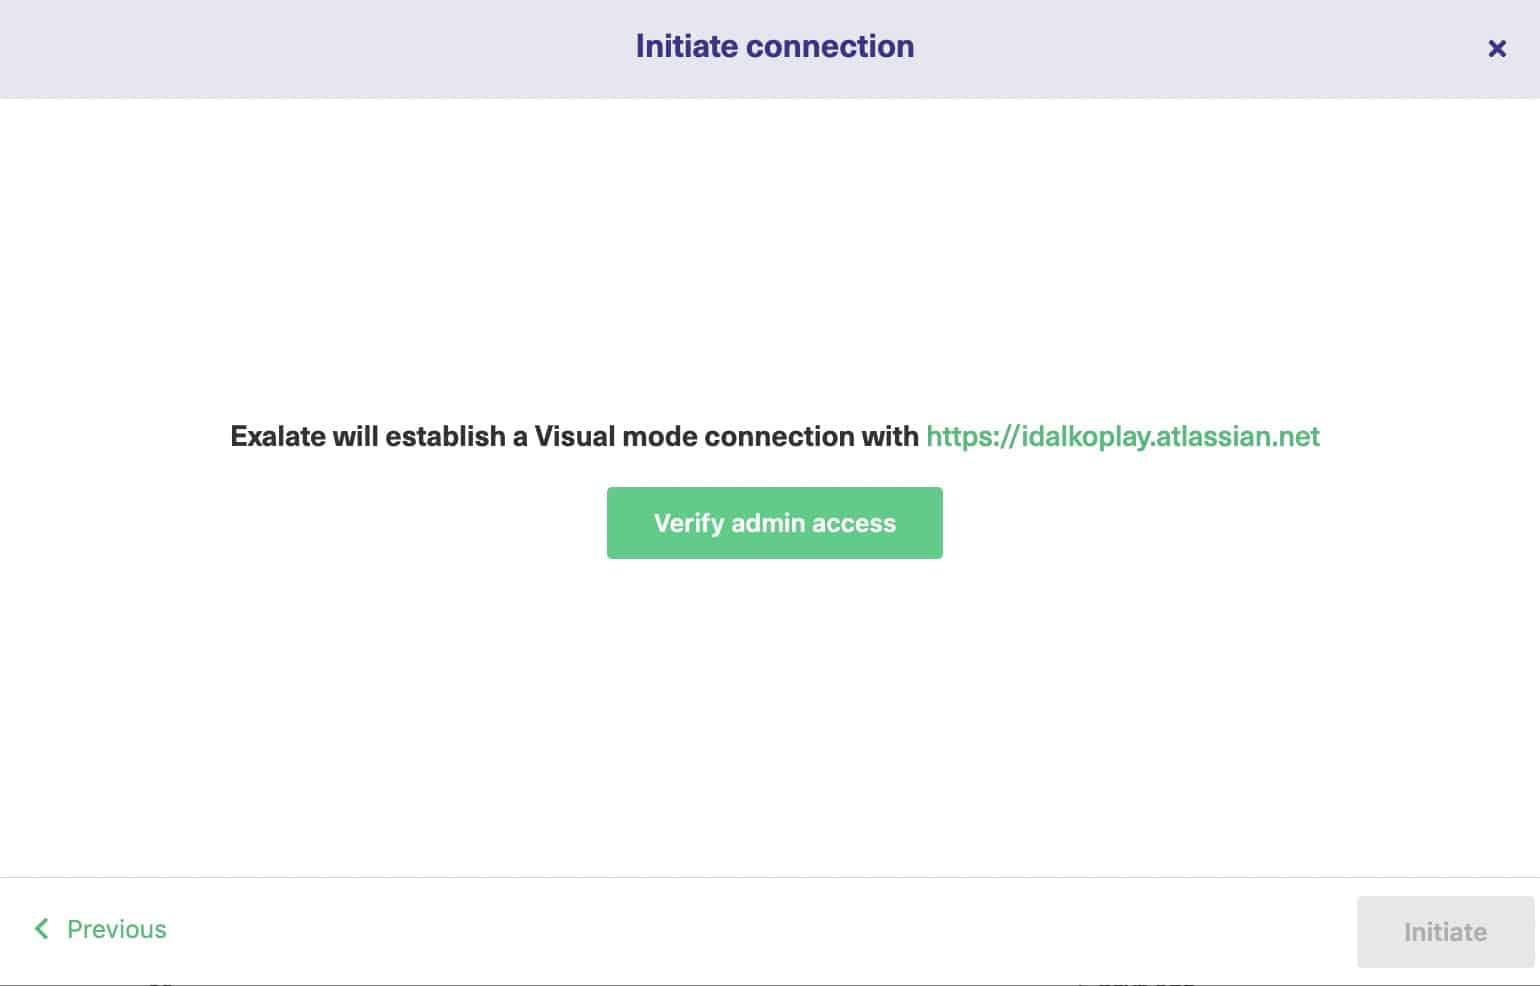
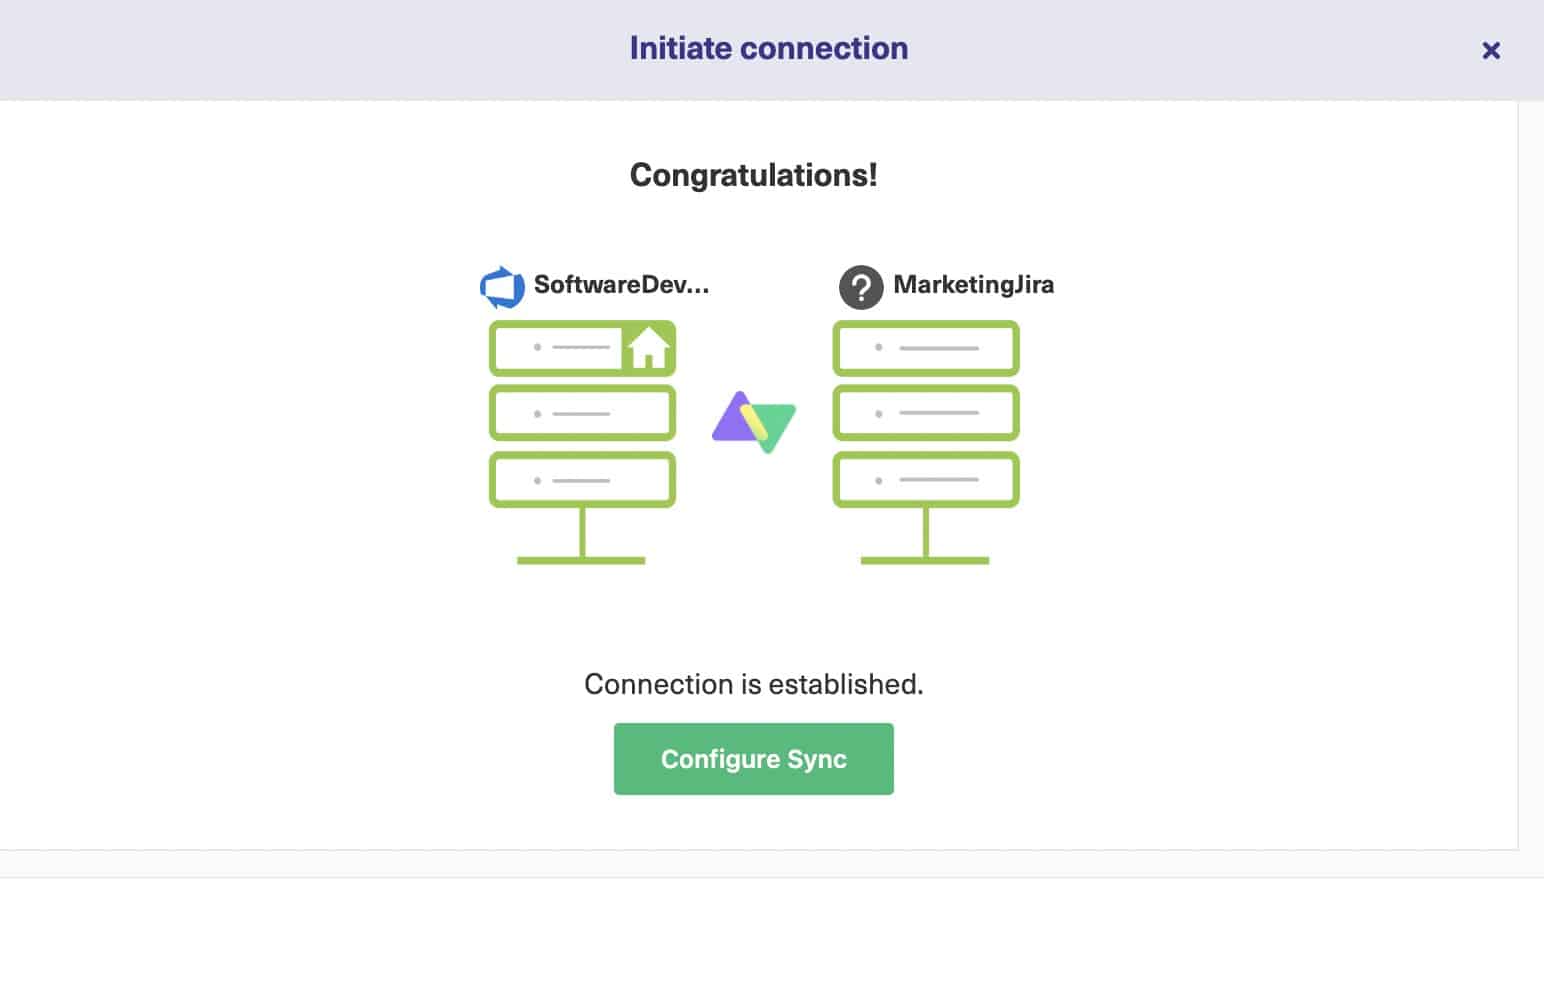
Once the verification is successful, click the “Initiate” button. After this, you have successfully created a connection between Azure DevOps and Jira in Visual mode.
We will cover the “Configure Sync” part of the connection in Step 4.
The AI-Assisted Script Mode
For the Script mode, after hitting “Next”, enter the connection details just like for the Visual mode. After doing that, “Select the project” on the Azure DevOps side from a drop-down list and click “Initiate”.
Now, Exalate has generated an invitation code. Copy this and save it somewhere.
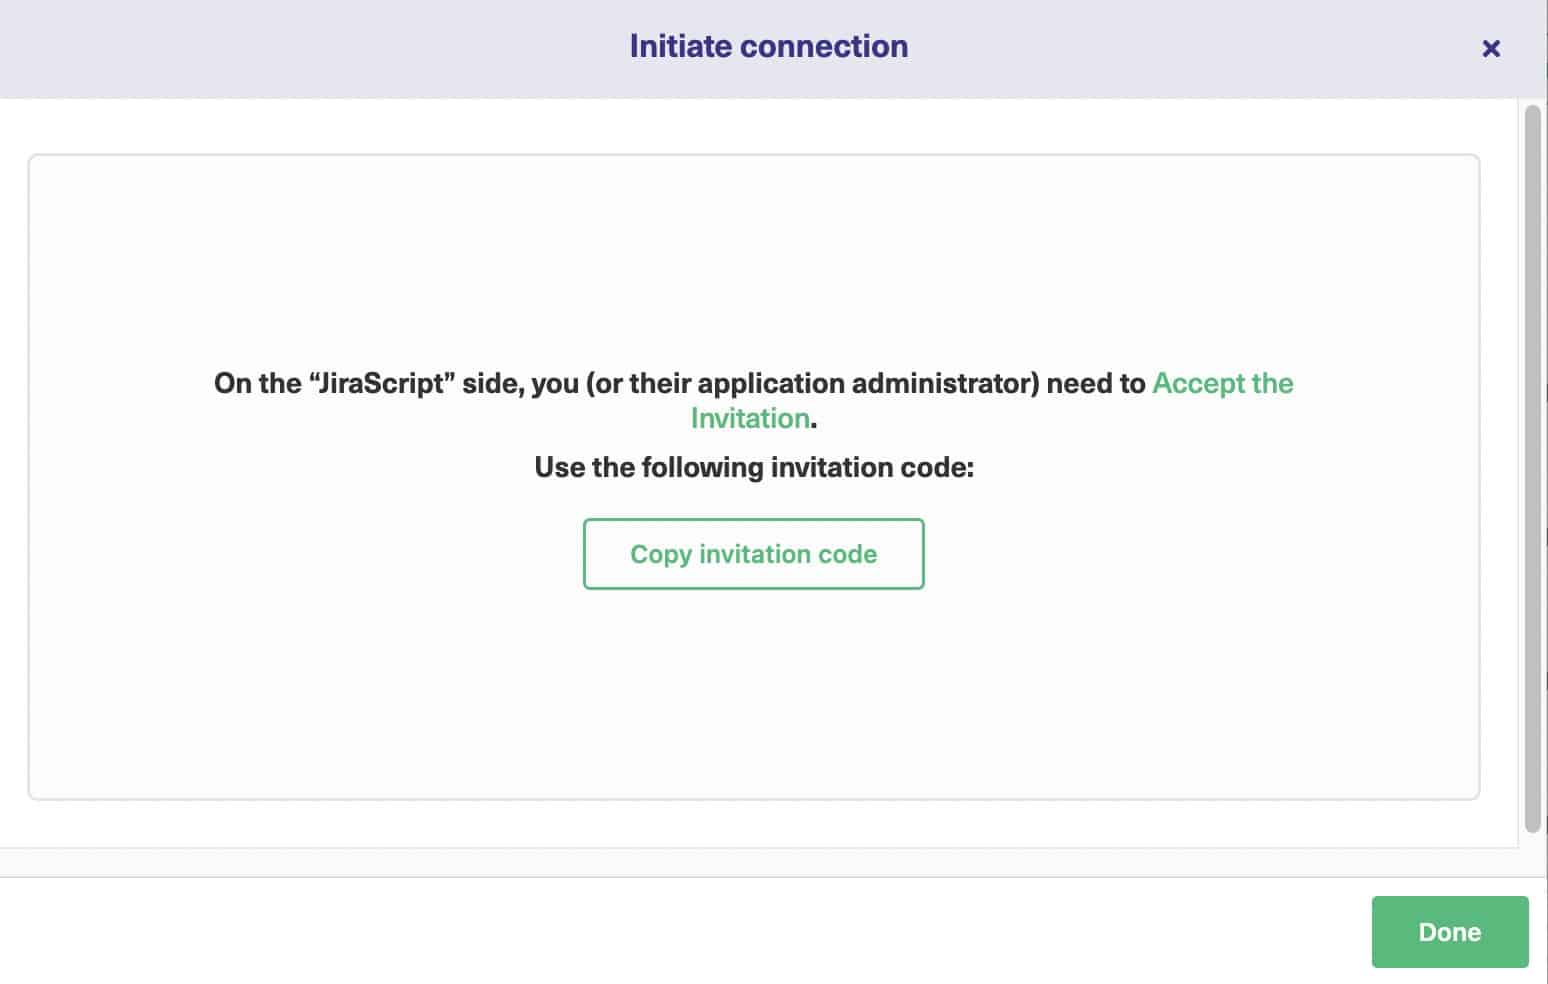
We’re done with Azure DevOps for now, but we need to enter our code into Jira as well.
So let’s head back there. Look in the “Apps” section in Jira by clicking on the cog icon on the top right side, then click “Connections” from the Exalate section in the left-hand menu.
Click the “Accept Invitation” button.
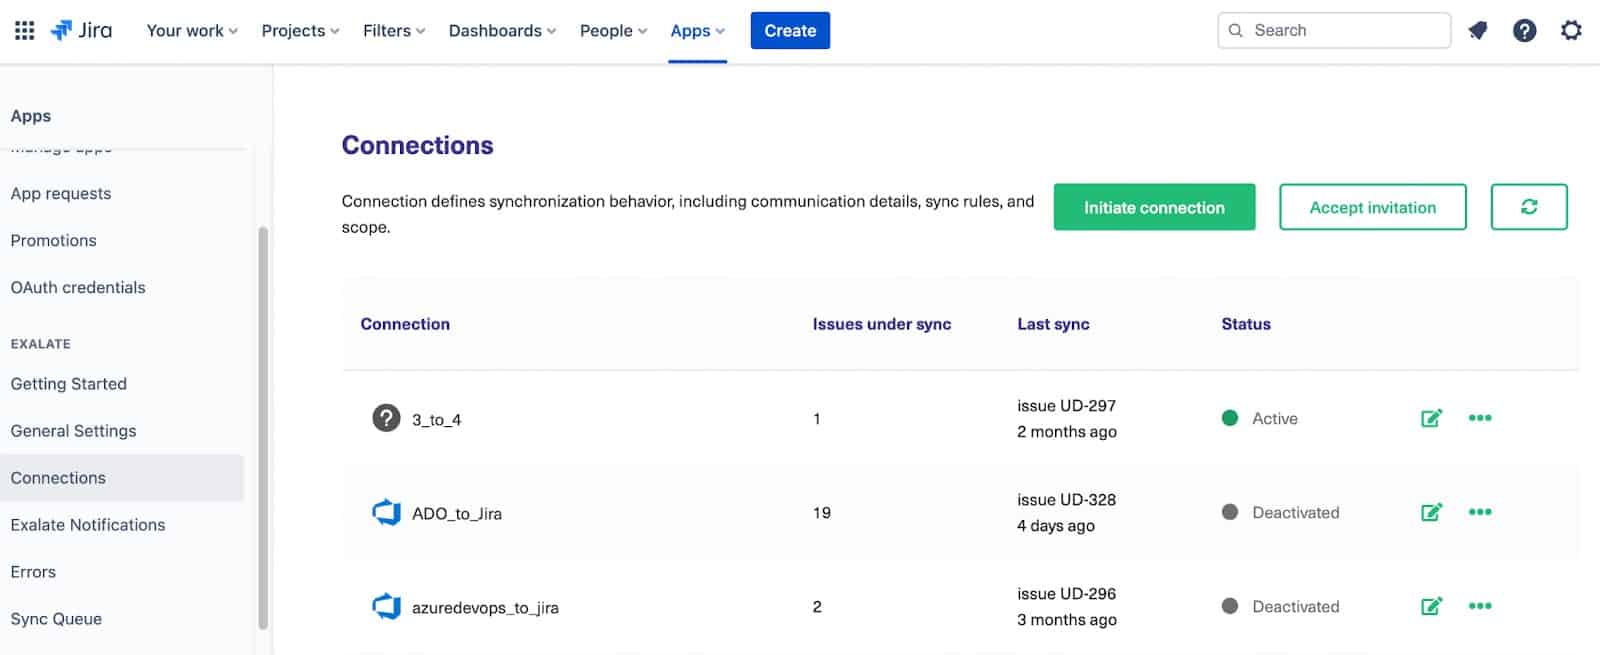
On the next screen, you’ll see a space where you need to enter your invite code.
Copy the one generated earlier, and paste it here.  And click “Next”. On the next screen, choose the project to work with from the drop-down menu.
Then click “Confirm” to create the connection on the Jira side.
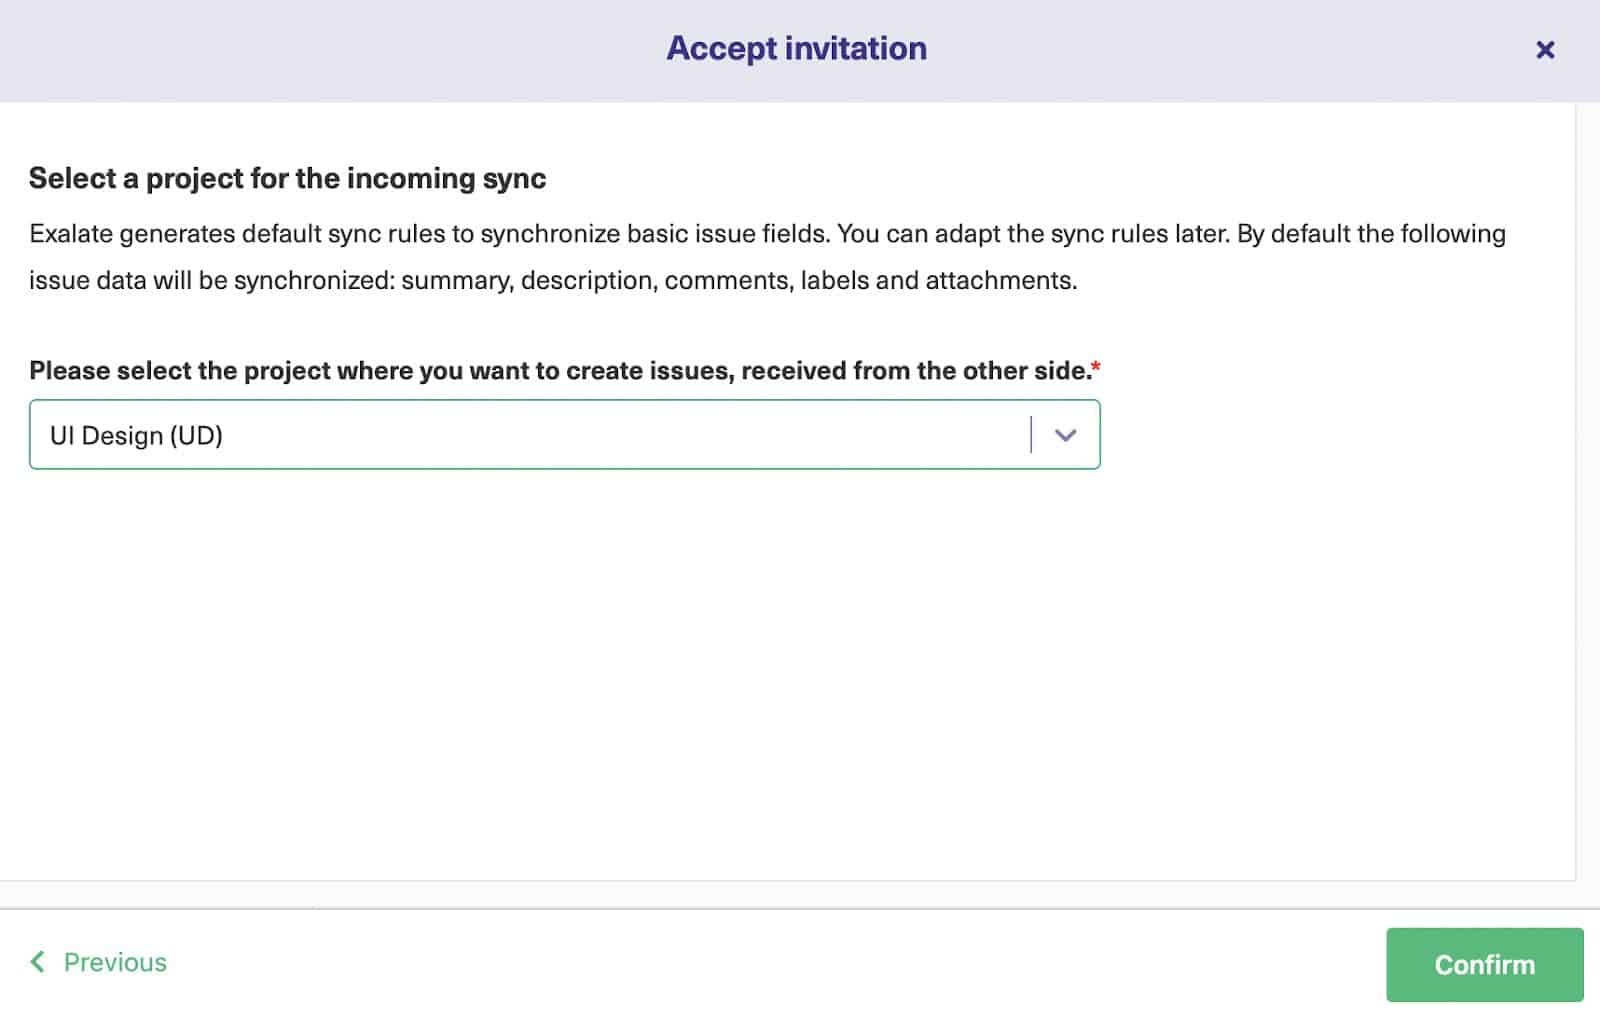
After this, the connection has been established successfully and you can continue to configure it as shown in step 4.  We can also see our connection added to the list of connections as shown in the image below.
Step 4: Configure your Connection to Determine What Information Gets Shared
Now let’s configure the connection to make sure it shares what we want.
You can configure the connections established via “Visual Mode” and “Script Mode” immediately after you have created them by clicking the “Configure Sync” button. Or you can look in the action column on the right side of your connection name and click the “Edit Connection” icon.  Either way, you will get different screens to configure your connections in Visual Mode and Script Mode.
We will take a look at both.
In the Visual Mode
You have the “Scope” and the “Rules” tabs.
Select the names of both the projects from Azure DevOps and Jira between whom the synchronization needs to take place. The “Sync method” allows you to decide whether synchronization must happen manually or automatically.  Note: This screen appears when you click the “Configure Sync” for the first time. But you can also edit the “Scope” and the “Rules” by clicking on “Edit Connection”.
Move ahead to “Filter Entities”:
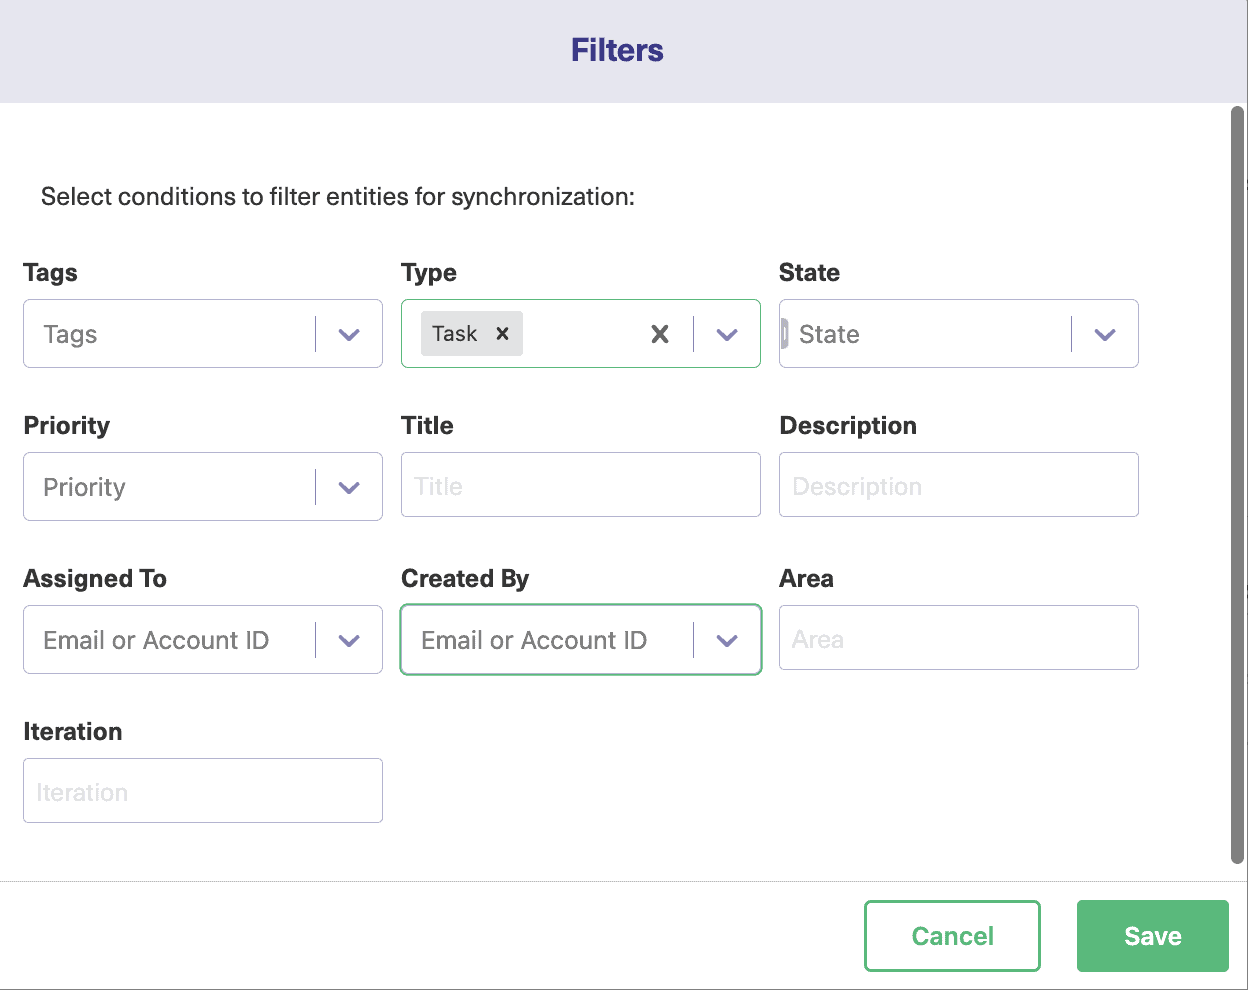
This decides which issues or work items need to be shared between Azure DevOps Jira.
Note: The “Filter Entities” screen is tracker specific. There will be a different one for Jira.
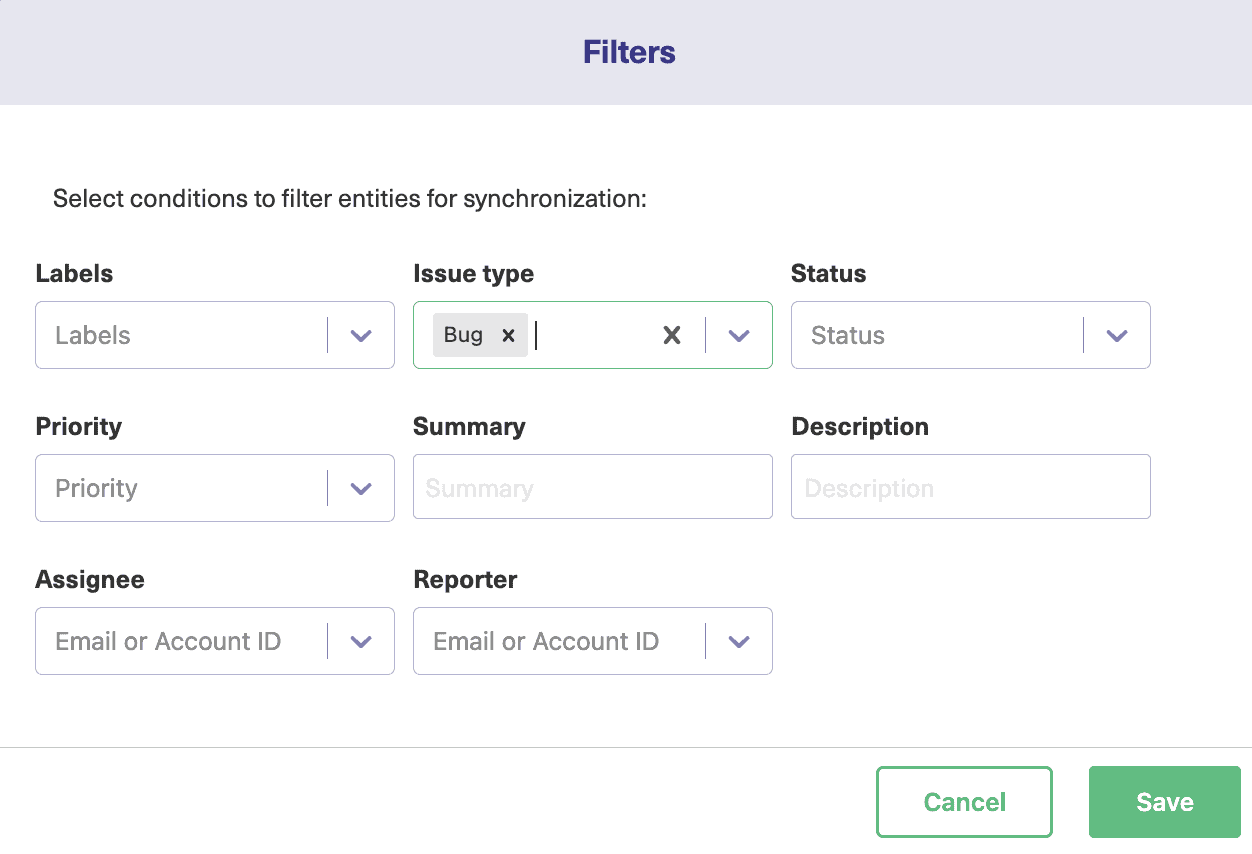
Hit “More” for advanced options. Click “Save” once you finish making the changes.
After this, you can configure the connection under the “Rules” tab.
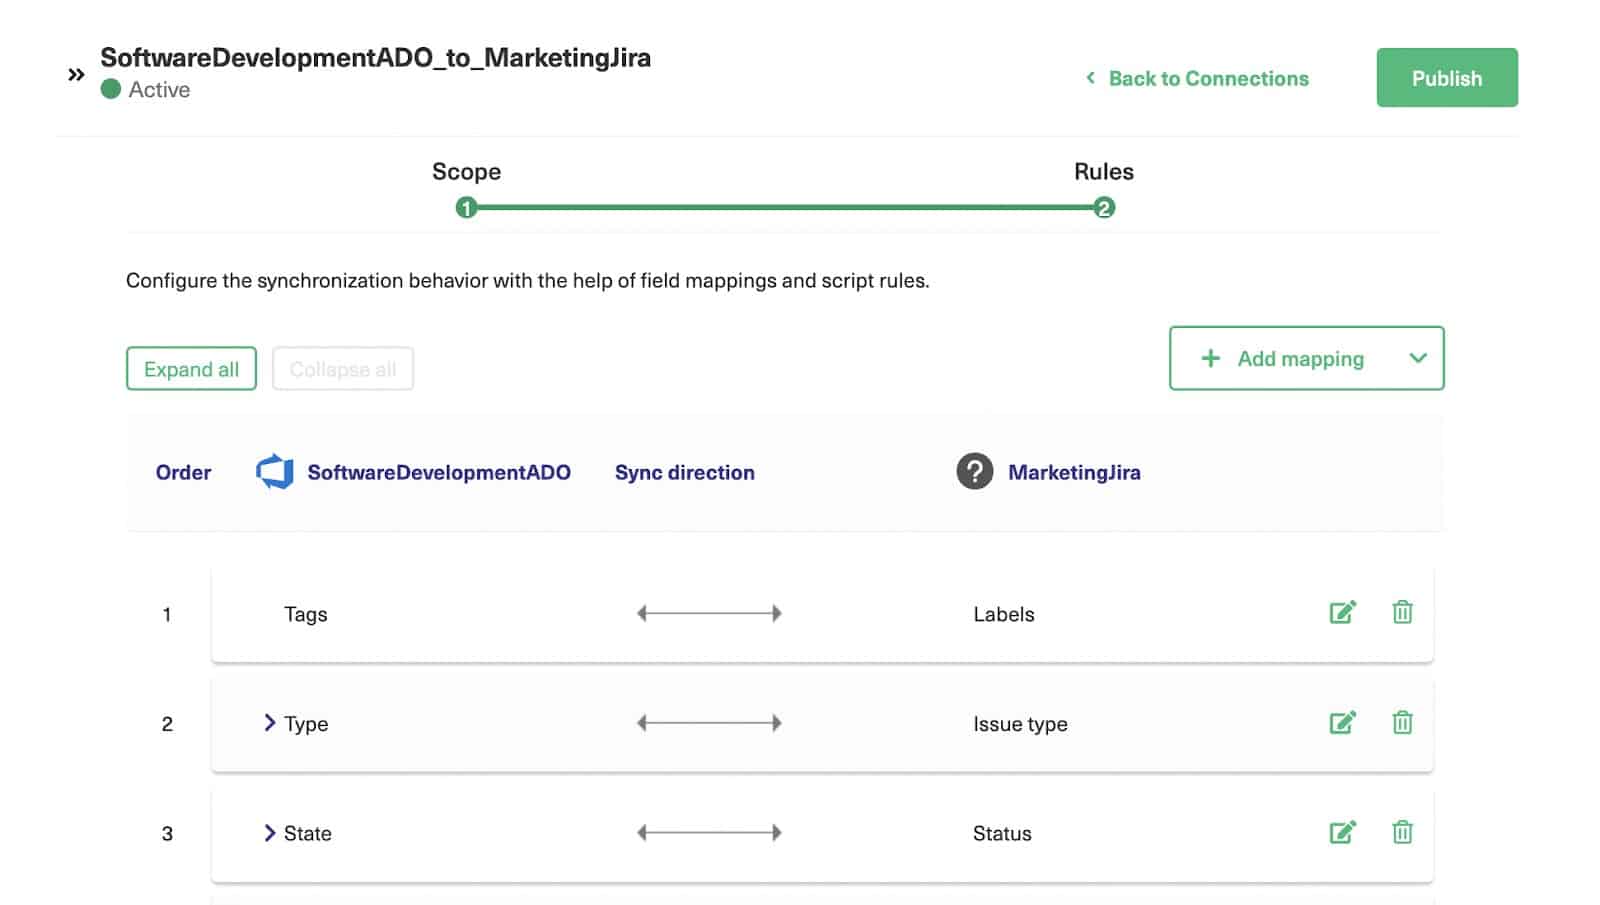
This tab displays the default mappings, for instance, Tags in Azure DevOps are mapped with Labels in Jira. Each entry can be deleted or edited.
You can even drag entries up and down to assign priorities. There’s a “Expand All” and “Collapse All” button as well.
You can add a completely new mapping by clicking on the “Add Mapping” button.  Select the entities to be matched on both sides. Also, select the “Sync direction”.
You can even specify what must happen if no matching value is found. You can either “Set a default value”, “Report an error” or simply “Do nothing”. Click “Save” to confirm changes, else go back to the “Rules” tab by canceling the window.
On the “Add Mapping” button, if you click on the down arrow next to it, you can “Add Script” to help with additional mapping scenarios. Remember, Exalate uses Groovy scripting language, so you need to understand the language beforehand. We will cover this in the coming section anyway.
Once all this is done, don’t forget to “Publish” the changes.
In the Script Mode
After clicking the “Edit Connection” button, click the “Rules” tab on the next screen.
This screen will show you what data is shared between the platforms.
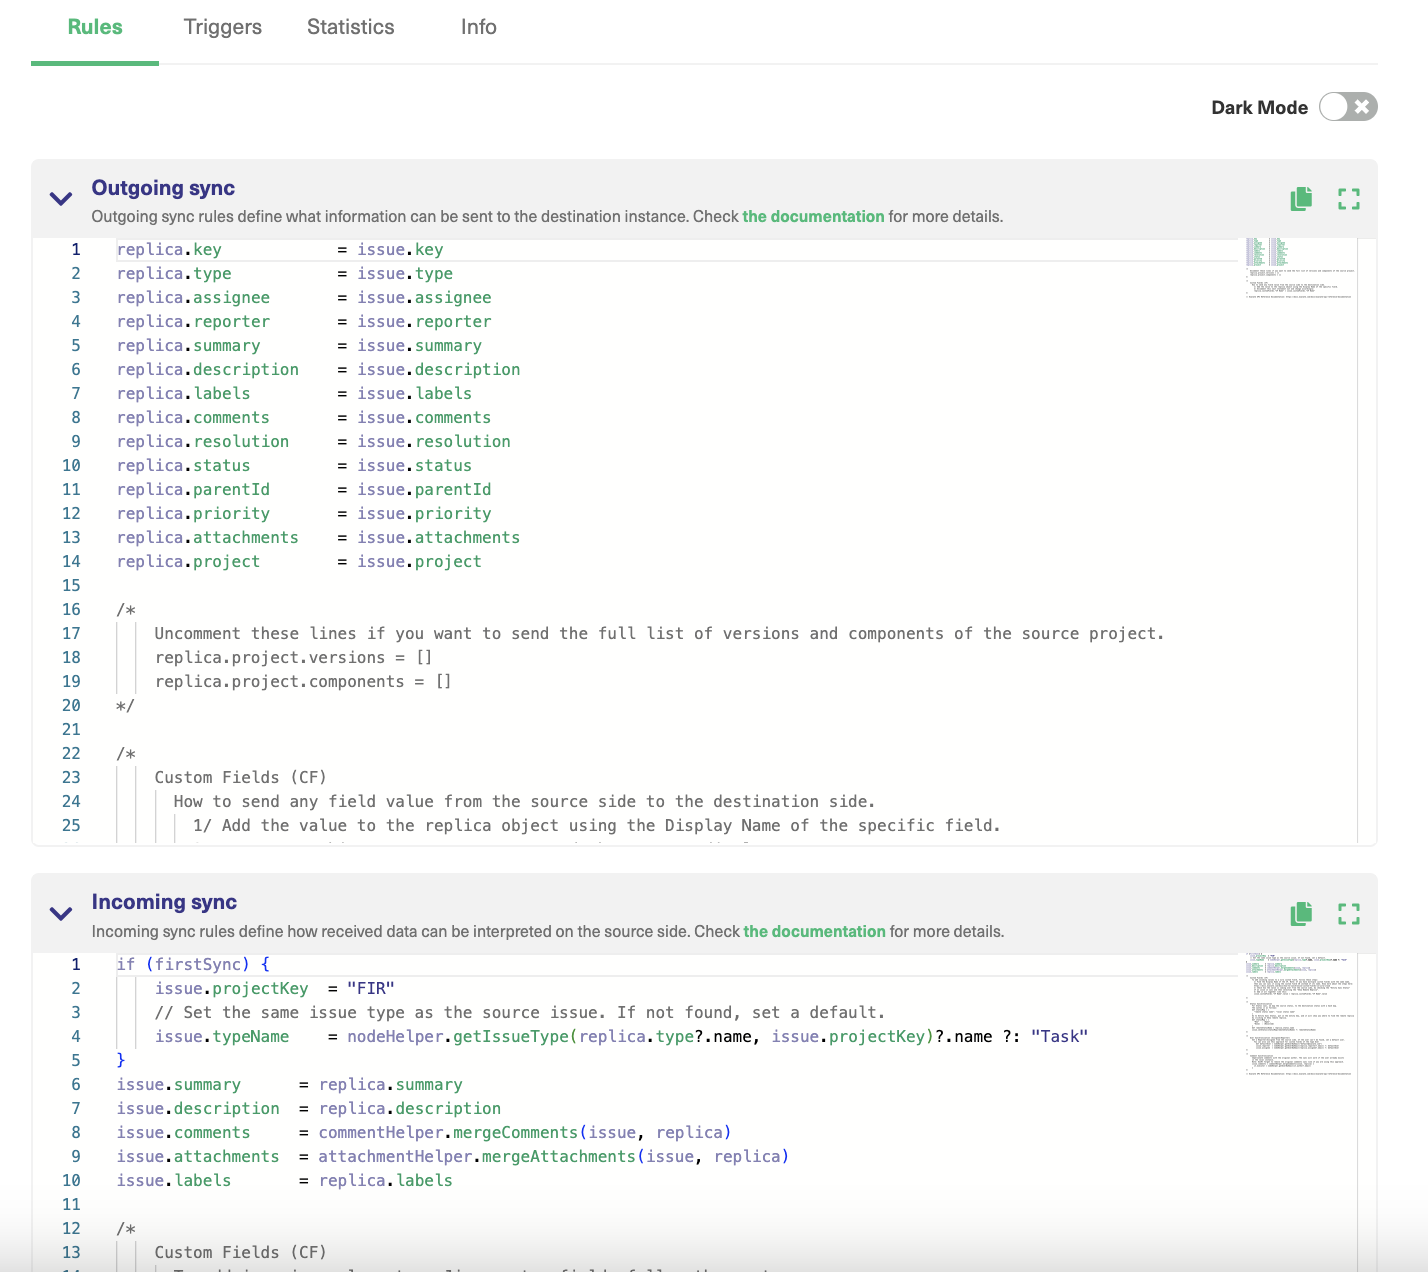
The sync rules show how the information stored in one system is matched to that in another. These will usually match correctly, but it is worth checking to ensure that is the case. If you have any custom fields or unusually named items, it’s especially important to check this. You can also customize it however you like.
The Outgoing sync rules control what information must go from the source to the destination instance and the Incoming sync rules control how to receive the information coming from the other side. These sync processors are present at both ends independently.
Maybe you want some information to be listed as comments so you can browse through it easily. It’s up to you.
Look where it says “replica.assignee = issue.assignee” for example.
Replica acts like an envelope in which you fill in the information you want to send to the other side. It travels to the destination where the contents of the replica are opened and applied to the destination instance in whichever way makes the most sense.
Coming back to our example, the assignee fields on both platforms. You might want a specific team member to deal with information shared with your other teams. In that case, you can add the person’s name to the sync rules. You can delete any lines you don’t want to be synced, and change anything you want to be sent to a different field.
Adding and deleting lines is straightforward.
Changing field names is also simple. Just change the text after the dot. If you understand code, you can do more and set specific conditions for when things are shared. Take a look at our script helpers guide for more information on what you can do.
AI-Assisted Script Mode
Exalate’s scripting engine enables you to implement literally any use cases. But speed also matters. That’s where you can use the AI Assist to help you with the scripting part.
The AI Assist feature appears as a chat window in both the incoming and outgoing sync rules tabs.
All you need to do is to type your sync requirements into the chat and AI Assist will generate the scripts for you. Note that like any other AI, AI Assist makes mistakes and needs detailed prompts. The clearer, more detailed you prompt, the better the result.
Here’s an example of how to use AI Assist:
Let’s say you want to sync work item statuses from Azure DevOps with issue statuses in Jira. In the AI chat, you could type something like this.

It normally highlights the changes to indicate where you need to deletes a line or have new additions.
You can accept/reject the suggestions and redo your prompt, if needed. Once set, just publish the change and you’re good!
Step 5: Set up Automated Synchronization Triggers
Our platforms are now connected and we have chosen what information to be shared. Next, we need to select what will trigger the sharing of that information. 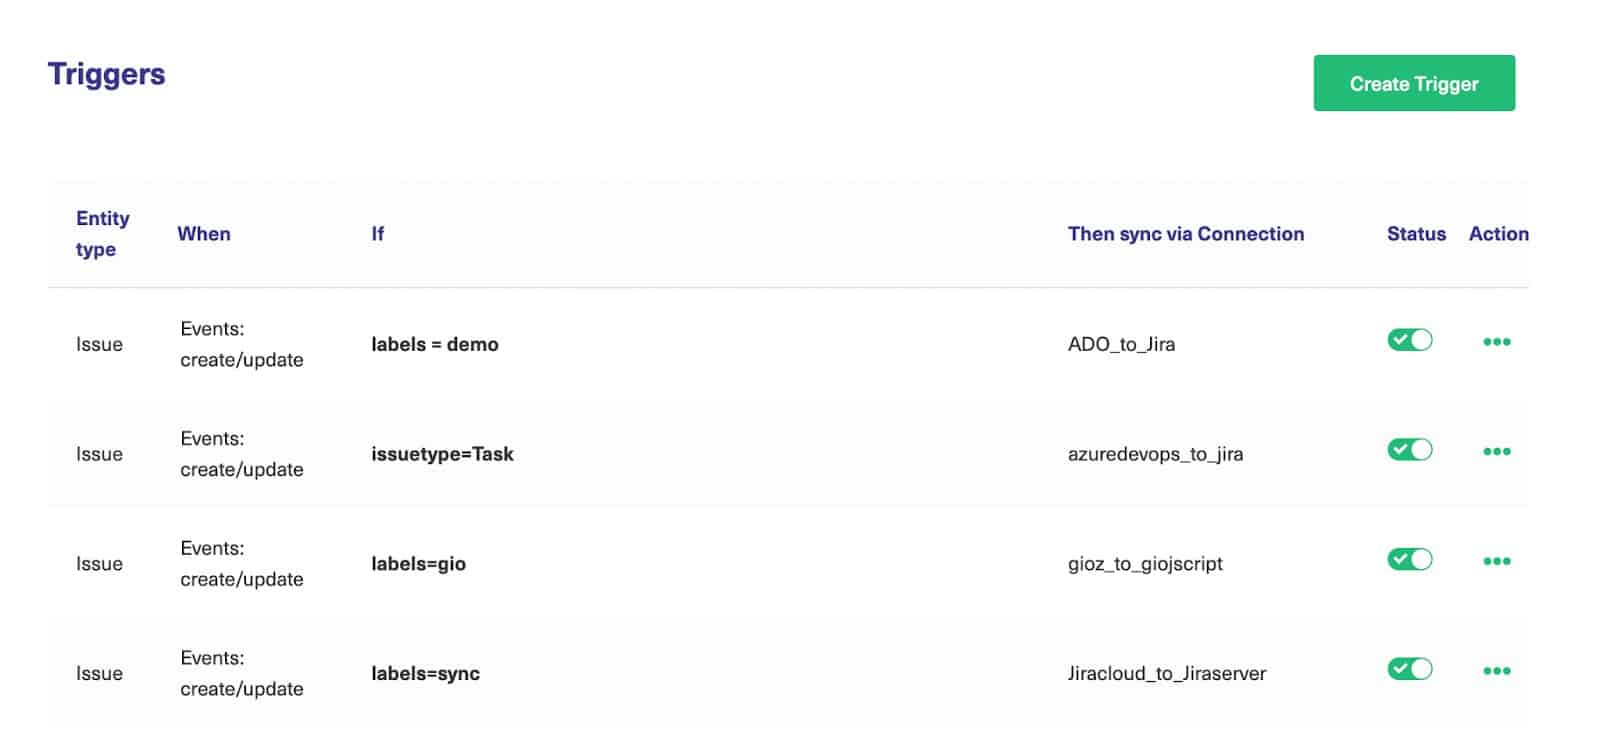
You can create Triggers by clicking the “Triggers” option next to the “Rules” tab in the Script mode configuration screen.
Note: You can even create triggers in Jira by clicking “Triggers” in the left-hand Exalate menu.
If this is not the first time creating a trigger, you will see all of them listed on this screen. To create a new one click the “Create Trigger” button.
Check this documentation page to understand more about how to create triggers.
Note: Triggers need to be created at both ends depending on your sync requirement. For instance, if you want an automatic two-way sync between Jira and Azure DevOps, you need to create these triggers at both ends.
On the “Create Trigger” screen, in the “If” section you can specify the conditions for starting the trigger. As mentioned above, they can be created at both ends and so are platform specific.
In Jira, we can enter a JQL (Jira Query Language) query that lets us choose when and how issues are synced.
In Azure DevOps, we can use the WIQL (Work Item Query Language) for creating triggers.
This might sound intimidating, but a pop-up guide will appear as you type, showing you what commands are available. It is intuitive and powerful, so give it a try!
In the example given below, we have created a trigger so that anytime a label ‘todev’ is attached to an issue it is synced over to the Azure DevOps side. Once you’ve done this, choose the connection to sync with from the drop-down box, and enter any notes.
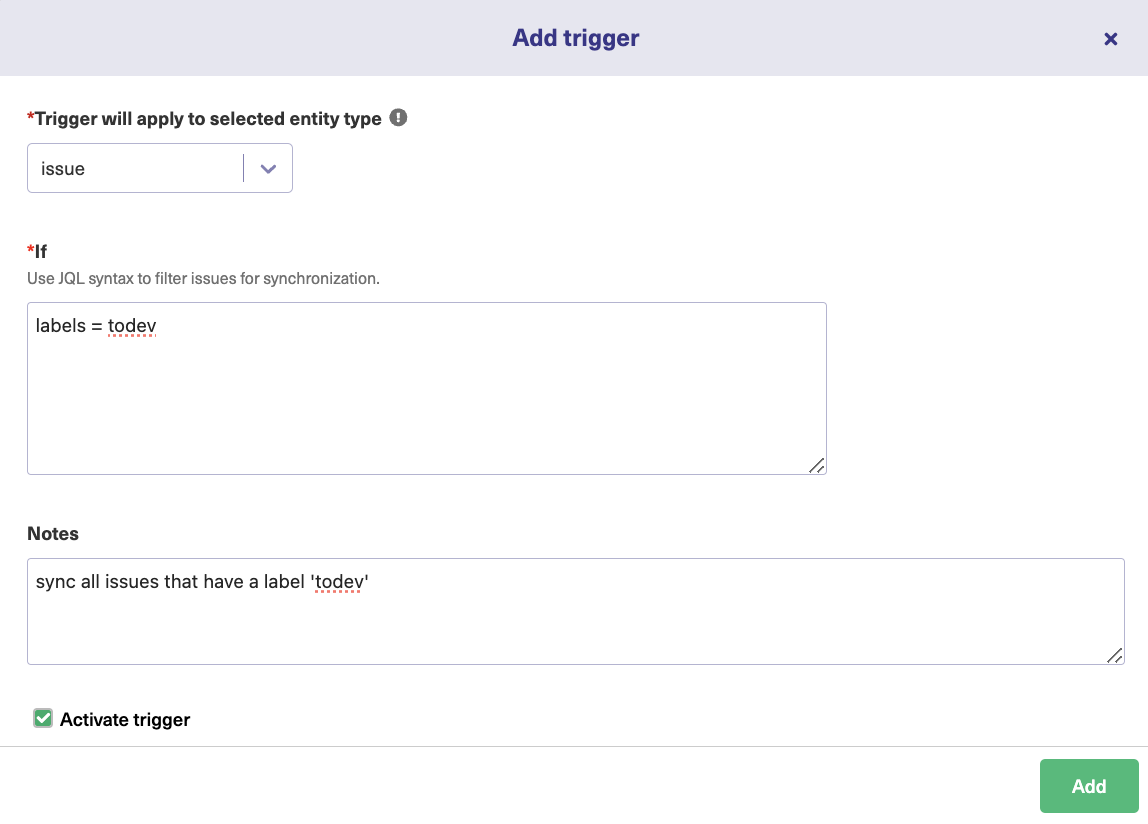
The notes are especially useful for keeping track of multiple connections with different purposes. There’s also an “Active” switch to turn the trigger on and off, so don’t forget to activate that if you want the trigger to work.
When you’re done, click the “Create” button. Your newly created trigger will share information according to the conditions you have set.
You can view the trigger you have created in the “Triggers” and even click the 3 dots in front of its name. By doing so you can edit or delete the trigger. You can even choose to sync existing work items and issues matching the trigger conditions by clicking the “Bulk Exalate” button.
That’s all that needs to be done! The synchronization will happen based on the Trigger conditions you have set. You can have a look at the various synchronization and bulk operations that Exalate supports.
We have seen how Exalate’s Script mode can help you connect Azure DevOps to Jira in an advanced manner. Let’s put that into practice!
Advanced Jira Azure DevOps Integration Use Cases
The possibilities with low-code integration solutions like Exalate are endless. You can basically sync any data available via REST APIs between Jira and Azure DevOps.
A few practical use cases we swear by:
- Sync and maintain issue links, relations, and sub-task mappings between Jira and Azure DevOps
- Maintain issue hierarchy when integrating Jira on-premise and Azure DevOps
- How to sync custom fields between Jira and Azure DevOps
- How to Sync Priority in Jira to a Picklist Custom Field in Azure DevOps
You can explore all available options in the Exalate API reference documentation.
Things to Keep in Mind When Completing the Integration Between Azure DevOps and Jira
When setting up your integration between Jira and Azure DevOps, there are some things to look out for. Being aware of these issues will help keep your teams happy and make your changes successful.
Role Clarification
When integrating tools, don’t forget to use them for what they’re good at. Jira is best at issue tracking. Azure DevOps is better for teams using a DevOps toolchain.
It is important to assign proper roles and responsibilities within these platforms. Having proper access control mechanisms in place, for instance, the right set of people accessing the Exalate admin console to decide which entities to put under sync avoids confusion later on.
Too Many Messages
Most platforms send notification messages when certain things happen. This could be when a ticket is created, or when someone leaves a comment. Your integration means this information is shared automatically, which is great. What’s not great is when everybody’s in-tray fills up with unwanted messages.
Make sure you tune your notification settings to avoid swamping people with emails. You can configure your notifications in Exalate via the Exalate admin console.
Validation Errors
If you see a validation error when putting your credentials into your Exalate node, try waiting for a while. It may take time for the servers to propagate.
There are ways in which such validation errors can be solved in Exalate.
Architecture, Security, and Deployment for a Jira Azure DevOps Integration
Alright, let’s now discuss Exalate technology in more detail. If you’re using it, you may be curious about its architecture and security features it has.
Architectural Autonomy
This diagram shows Exalate’s architecture:
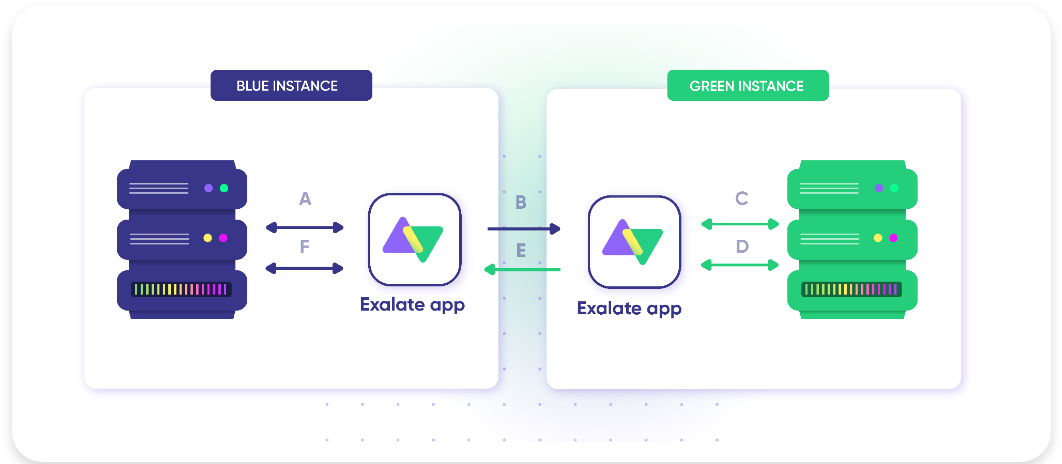
The Blue instance represents Azure DevOps and the Green instance represents Jira. Exalate agents for each platform sit in between these two services and handle the exchange of information between them.
- The letters A-F show how information flows between platforms. Both services use Exalate as an intermediary, which maintains the autonomy of each one.
- The Exalate agents control what gets sent and how information is matched from one platform to the other.
- As well as Azure DevOps and Jira (Cloud and on-premise), there are Exalate agents available for GitHub, ServiceNow, Salesforce, HP ALM/QC, and Zendesk. More services will be added soon, so check back later if the one you need isn’t ready yet. You can also request an integration.
- The distributed architecture explained above is what makes Exalate a unique integration solution supporting decentralized integration. This enables each side to control information exchange independently, without having to consult each other.
Security
Security is definitely a key consideration when exchanging information between platforms. Exalate is designed with security in mind so you can trust it to synchronize information securely. It uses the secure HTTPS protocol for most data exchange and nodes use a reverse proxy for data termination.

Conclusion
Using work management systems and online services is a core part of many businesses, and linking them effectively can be key to ensuring your teams work together efficiently. Being able to join the dots in your organization will save you time and money. Platforms like Azure DevOps and Jira all have their pros and cons, and working with both of them together can cause headaches.
The right software integration solution can let you take advantage of their strengths while dodging the pitfalls that can harm your productivity. It gives you the reliability of an automated tool, as well as flexibility, letting your teams customize their own workflows. They can work independently, but without the information, they store being locked away from other teams.
This means you can pick the right platforms for each part of your business, without having to worry about how they connect to one another. So let the software do the hard work for you.
In this guide, we’ve set up the integration using Exalate. And we’ve described the step-by-step process on how to complete this integration to bridge the gap between systems, different teams, and companies.
If you’re an IT professional and are interested in learning more about software integration, you can download this ebook and read all about effective cross-company integration.
You might also want to find out more about aligning ServiceDesk and development teams in this blueprint.
Recommended reads:


